You're about to recaulk the tub, and there's a half-used tube sitting in the garage. The tip is a little dried out, but you figure you can cut it back and finish the job.
That's usually where I see these jobs go wrong.
Once the caulking tip dries out, it's typically unusable at that point. Sometimes you cut the tip back a little further and unclog it, but oftentimes that leads to a bigger bead (the line of caulk) than you need, producing less than ideal results.
That isn't the only problem I see. Even when a tube isn't clogged or dried out, I often see the incorrect caulking being used. It can look fairly decent to the eye, but up close, upon inspection, you can see that the caulking is not even creating a seal. It's more or less just laid on top of the surface instead of sealed.
That's how water gets in. And that's when mold starts showing up in the line. For some people that's mostly an eyesore. If someone at home has asthma, a mold allergy, or a weakened immune system, it matters more. The CDC says people with asthma or mold allergies may have severe reactions, and people who are immune-compromised or have chronic lung disease may get lung infections from mold.
Check the date on the tube first
Caulk doesn't last forever, even in an unopened tube. DAP says the shelf life of most caulking products is one year from the date of manufacture, when stored properly. GE prints a "Use By" date on the bottom of the cartridge. If you can't read the date, don't guess. Test it before you put it on a tub or shower.
GE notes that heat, humidity, and direct sun can shorten shelf life, even before a tube is opened. A closed garage in Chula Vista or the South Bay in summer is a hot place to leave one.
How I tell if the tube is still good
You can tell if a caulking tube is still good by poking the tip out a little bit and then loading it into your caulking gun and putting a little pressure on it. If the product does not come out fairly easily, it's probably a safe bet it's going to be clogged beyond what is salvageable.
Be careful if you keep on trying to put too much pressure on the caulking gun while it's clogged too tightly. It could explode and blow out the back end, creating a much bigger mess than just replacing the caulking tube to begin with.
There's a second test that's worth doing even if the caulk comes out smoothly. GE's advice is to run a small bead on a piece of cardboard and wait about 15 minutes. If the product doesn't form a "skin" (a thin dry layer on the surface), it's probably too old and won't ever fully cure, meaning it won't dry and harden into a real seal.
If the caulk comes out watery, separated, lumpy, or uneven, don't use it. GE says that's another sign the product may be too old.
How I save a tube for the next job
I like to use caulking caps to save my caulking tubes for the next job. I've had pretty good results with them, and it's saved me trips to the store and waste on material. This is much better than the old screw stuck in the top method, which honestly never really works that well.
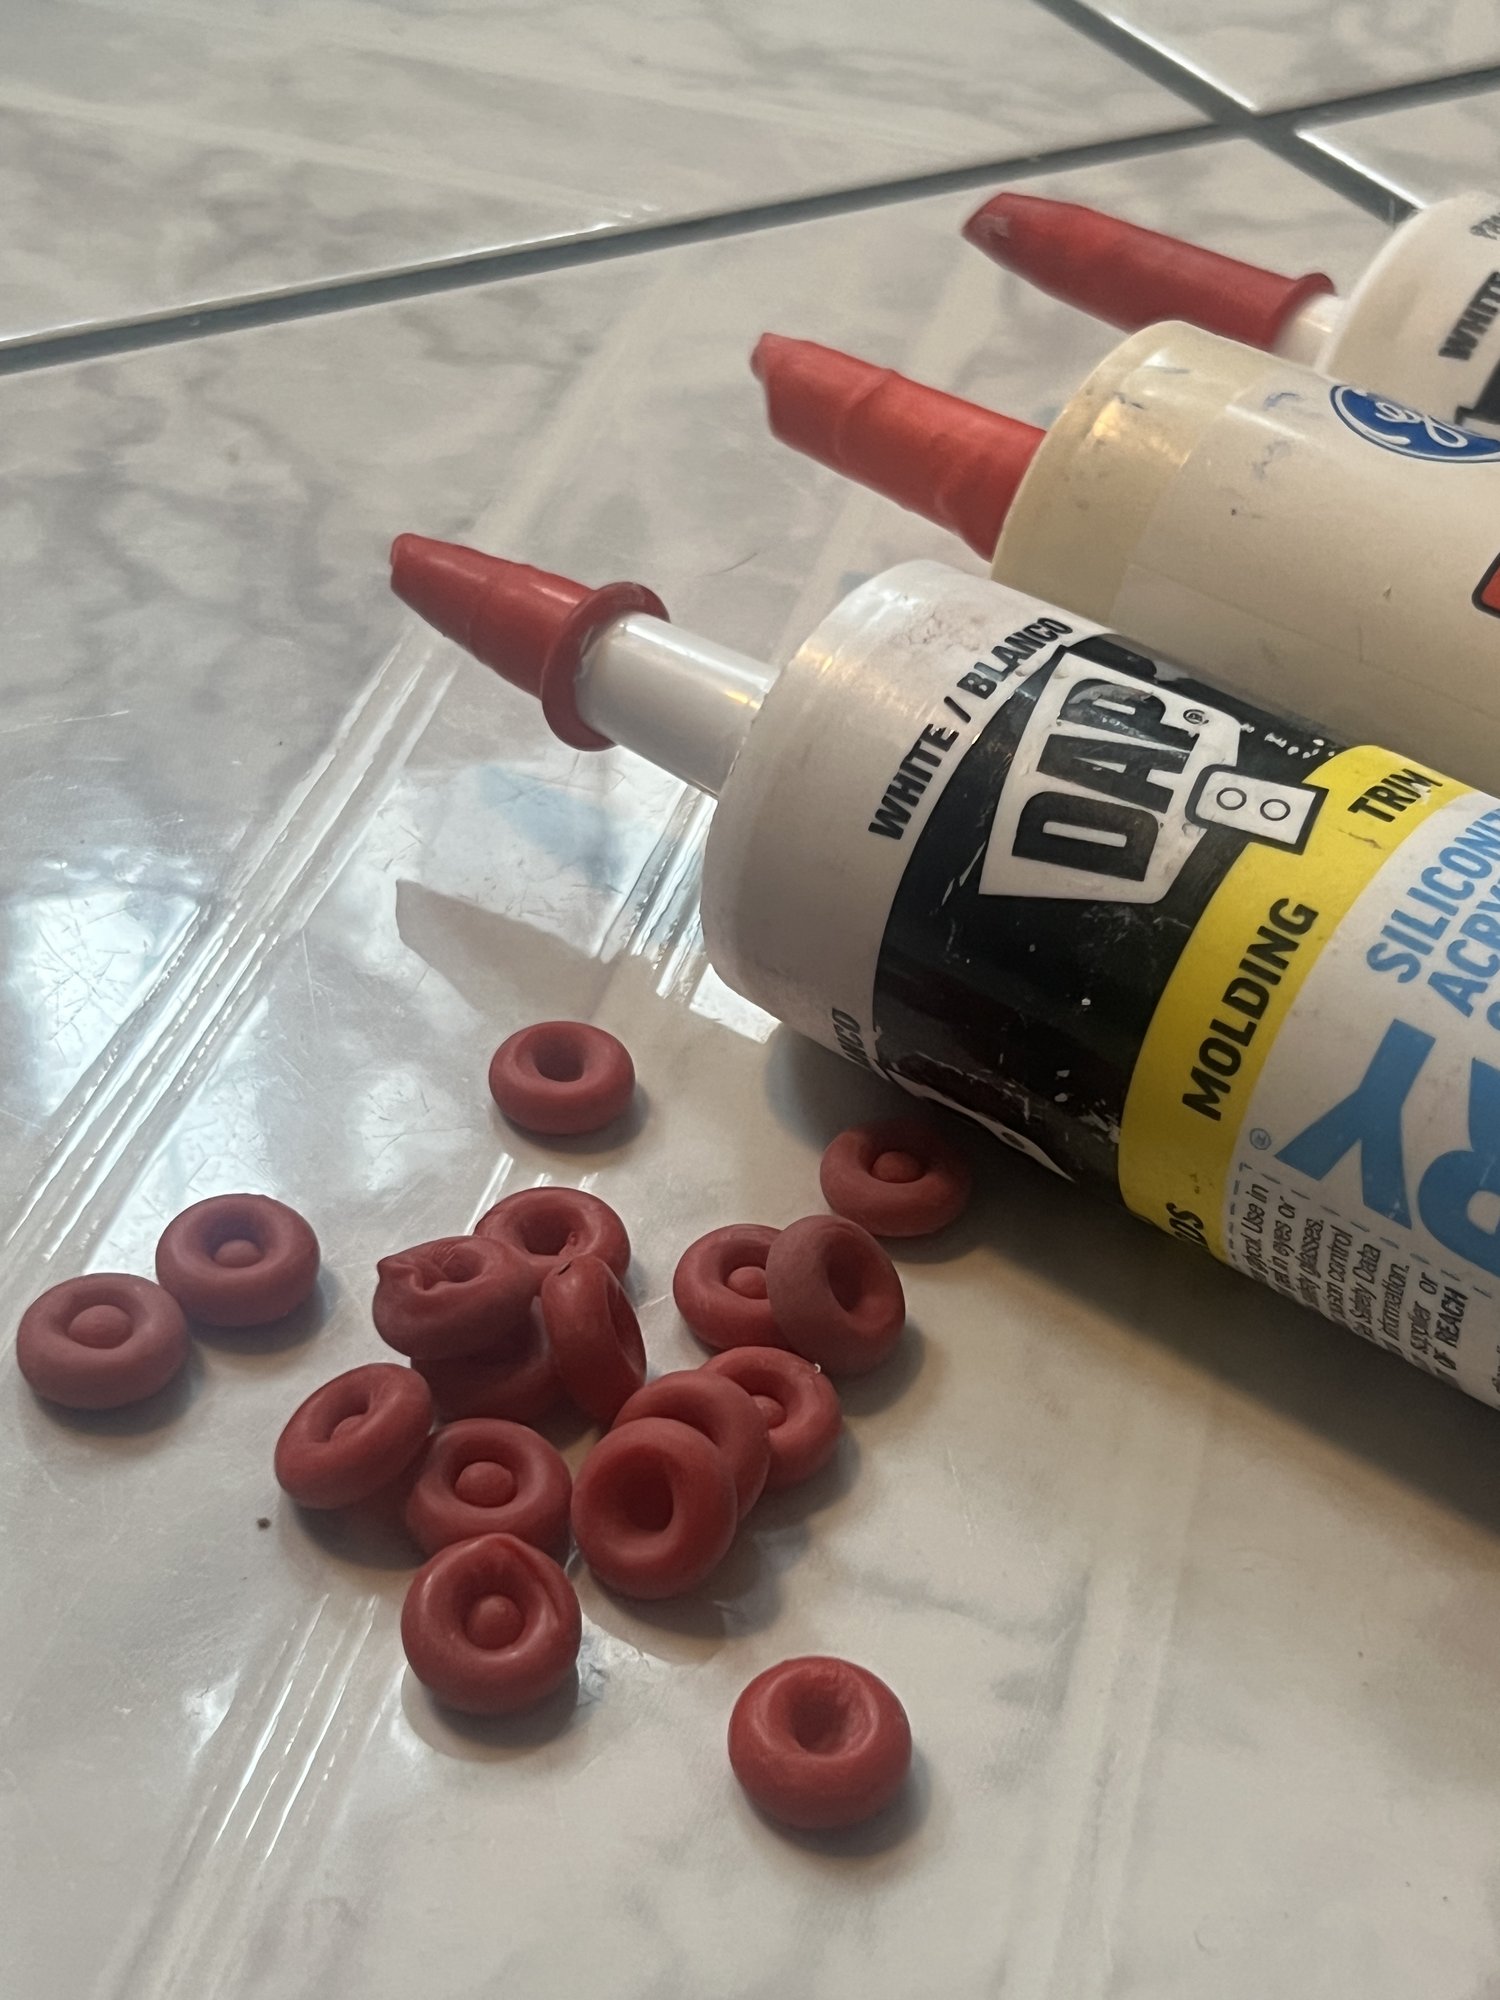

That second photo also shows why the product matters. One of those tubes is 100% silicone for kitchens and baths. The others are siliconized acrylic latex and a kitchen-and-bath acrylic. They're not the same thing, and I use the silicone in a wet area like a tub or shower.
Use the right caulk for the job
A tube can be fresh and still be the wrong product. That's often why a bead looks decent but never actually seals.
In a tub, shower, or other wet area, I use bathroom-grade 100% silicone. That's what I put down on a standard recaulk. A general-purpose or painter's caulk that isn't made for wet areas isn't the right product there. DAP says caulks made for baths are a better choice, because they're built for high moisture and have more resistance to mold and mildew. GE says the same kind of thing: use a waterproof silicone in kitchens and baths when you don't need to paint over it. 100% silicone typically can't be painted, so if the joint needs paint, that's a different product.
Prep is what usually goes wrong
Even a fresh tube of the right product won't seal if the joint isn't ready.
Typically, the things I see done wrong by homeowners or other professionals are improper prep. That includes thoroughly removing and cleaning the caulking and grout from the area to be serviced, and then using a fan to thoroughly air out the area to make sure there's no trapped moisture.
I need to absolutely make sure there's no caulking residue, soap residue, cleaning product residue, or anything else anywhere near where I'm applying the caulking, to get a nice, uniform seal.
GE says the same thing about silicone: it will not adhere to surfaces with soap scum or residue present. The surface has to be clean and dry. And I don't caulk over old caulk. The old material has to come all the way out first, or the new bead is just sitting on top of a failed one. I wrote more about that in Why Does My Shower Caulk Keep Cracking or Turning Black?
Send me a few photos
Call or text (619) 815-7588 (or call (619) 815-7588) with a wide photo of the area, close-ups of the seams, and your ZIP code. I'll confirm the price before I schedule. A tub or shower area is $180 labor, or +$90 as an add-on to another job on the same visit. That does not include the shower door frame. Photos are required for every request. Prices shown are labor only. Caulking typically has a materials cost of about $15 per visit, depending on the product used, which is added to your final quote. The full menu is on my caulking and resealing services page.